Amazon USA Seller Account: Tidbits About Business Plan & Step-by-step Guide To Create Account

Isn’t it just convenient to buy things online? Around 2023, almost 63% of the population in the USA will be inclined towards online shopping due to minimal shipping cost, reasonable price, and one-shop experience. It sparks the potential of Amazon USA seller account, which holds opportunities for future e-commerce entrepreneurs.
Almost half of the customers shop on Amazon weekly or sometimes more than that, even the shopping at the end of the month. There is a surge of shopping on Amazon for holiday gifts at the end of the year.
If you are interested in indulging in this frivolous opportunity Amazon offers, make an Amazon seller registration, once it’s verified you are good to start selling here right away.
In this guide, we will delve deeper into creating an Amazon USA seller account, and factors you need to be sure of before starting Amazon business.
Table of Contents
Know Your Business Before Creating an Amazon USA Seller Account
Before you begin creating an Amazon USA seller account, you need to figure out the business. Why Amazon? Because it isn’t stringent, there isn’t only just one way to start the business.
You can choose any model model and decide which products you want to sell to become successful on this shopping platform.
But the procedure to get running remains the same, so here are the steps you need to follow:
Choose Your Business Model

You need to be clear about which business model will suit you best regarding your selling method. There are several types which you can decide on:
- Online/ Retail Arbitrage
The Arbitrage method is finding low-cost products on other e-commerce sites and reselling them online in your store.
- Wholesale
It’s the practice where the businessman buys decorated products in bulk and then sells them as individual units in a retail marketplace.
- Private Label
It’s the retailer rebranding or renaming products that are already manufactured on their brand with their label.
- Handmade
These Amazon sellers sell off their handmade products including jewelry, accessories, clothing, home decor, etc.
- Dropshipping
In this business model, the Amazon seller doesn’t keep orders to himself but sends them directly to the manufacturer and supplier.
Decide Your Fulfillment Method
Once you have decided model, now it’s time to choose the fulfillment method that will work better for your business. The methods include:
- Fulfillment by Amazon (FBA)
- Fulfillment by Merchant (FBM)
Both methods have their own merits and demerits, so make sure you are well aware of both beforehand. It does not necessarily require you to choose just one option, you can fulfill orders from both FBM and FBA.
Decide Product(s) You Want To Sell
If you already have a product, then you are ready to proceed further, but still, you must consider this step earlier to make sure that the product you will sell is demanded over Amazon.
Find the products that are high in demand but have low competition that will require you to use tools that make this search easier for you i.e., Jungle Scout.
Register As an Amazon Seller
Now, it’s time for you to start creating your Amazon USA seller account and source your products.
Source The Chosen Products
If you have selected private labels as your business model, then you need a manufacturer who will craft your product by using Alibaba or other suppliers’ databases.
Create Your Product Listings
Now is the step to make your product listings, from where your Amazon sales grew. It explains the pros of your products how to use them and its specifications.
You can use an online tool as modern tools use AI features that write you a casting product listing in seconds.
Step-by-step Guide To Create Amazon USA Seller Account
Once you have decided on your business model, products, and fulfillment method, the next step is to register on the Amazon USA seller account. The procedure is pretty simple with no hurdles on the way:

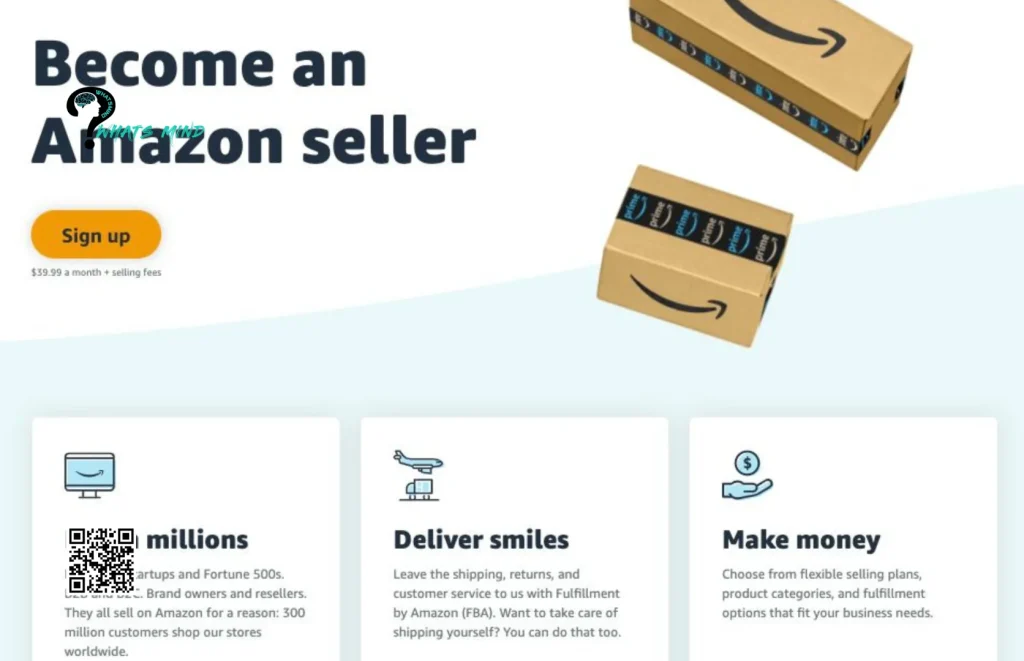
Visit the Official Website of Amazon Seller Central
Navigate to the official website of Amazon Seller Central and you are asked two options either sign up or learn more.
Click on ‘Learn More’ Button
Click on the ‘Learn more’ button and you will be asked to fill out your personal information. Your added information will decide whether you are eligible for the dedicated Amazon account rep or not.
In case, you don’t already possess a business website, you can simply add, ‘Amazon.com in the website field and submit. Once you have submitted it, you will be taken to the confirmation screen. ’
Sign Up To Your Account
If you have time, then wait for the email verification from Amazon, otherwise you can start right away. Sign up to your account and start selling.
- Remember when you sign up as a professional Amazon USA seller account, you will be charged $39.99/month. In case your listing isn’t active for one month, you won’t be charged that month. But if you have active listings then you will be charged again. If you have chosen an individual seller account, then you don’t need to get worried. You can even downgrade from a professional to an individual seller account at any time you want.
Add Your Credentials & Create A New Account
After choosing your seller plan, it will land you on another window where you have to add your credentials i.e., email address and password. Once added, click on the ‘Create your Amazon account’ button.
Proceed to another page and add the verification code sent to your email address, in this way, Amazon verifies the email. After verification of the code, you will be welcome to upload the following documents:
- Valid ID/ Passport
- Credit card statement/ Bank account
- Mobile phone number
- Chargeable credit card
Once you submit all of that, your submission will be verified then you can start selling.
Choose Business Location & Business Type
Now, it’s time to choose a business location and the business entity. As we are making an Amazon USA seller account our location is decided. As a business it the country from where your business will be operated, it’s necessary that it’s accurate as it will be verified afterward.
You can choose your business type from various categories including state-owned businesses, publicly-owned businesses, privately-owned businesses, charity-based, or the ones that belong to none and the owner is an individual.
If you haven’t started any business yet, amazon will ask you your full name, add, and then click on the ‘Agree & continue’ button.
Add Personal Details
Now to continue with your Amazon USA seller account, you need to provide your personal details which mainly include your passport number/ driving license/ or number of identification.
In the following step, you have to add a phone number that will be verified either through text message or phone call. Once you add the pin received from Amazon, your number will be verified.
Cross-check your added information, and then proceed by clicking on ‘Next’.
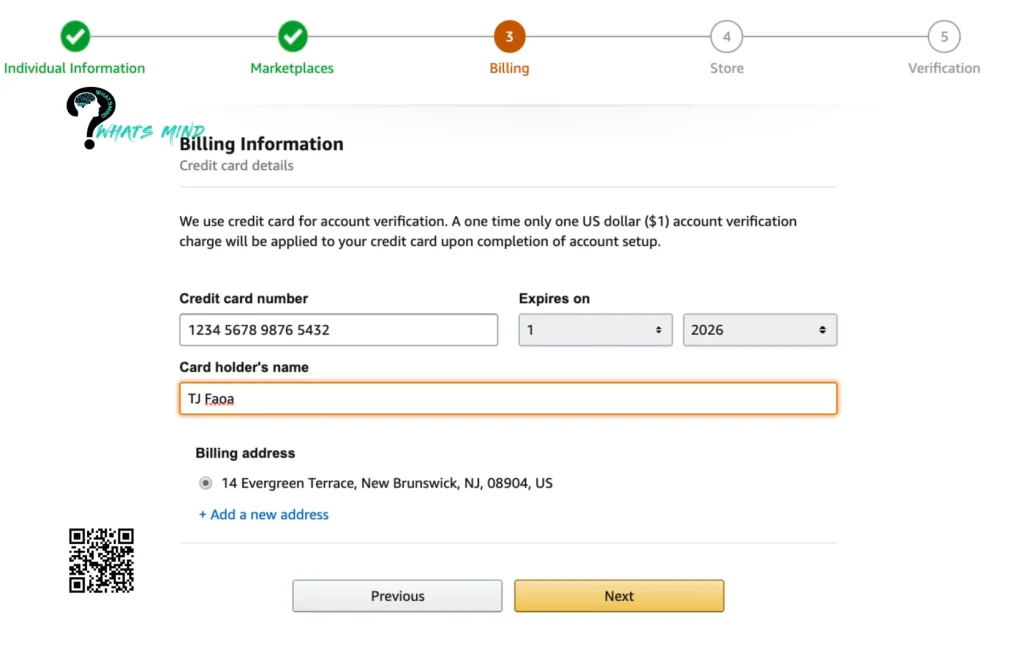
Add Billing Information

To proceed with your seller account, you need to add billing information. You have to provide Amazon with your recent valid bank account number or add your valid credit card number.
Add Information About Products & Amazon Store
After your credit card information is verified, Amazon will confirm your store and the products you plan to sell.
To proceed next phase of Amazon USA seller account registration, it will ask you some questions that you need to answer correctly.
- What is the name of your Amazon store? (If you haven’t confirmed it, no worries you can change it in future)
- Do you have UPS codes for your product(s)? (Despite the case, if you are sure or unsure just click on ‘Yes’.)
- Do you have diversity certifications?
- Are you the manufacturer or brand owner of the product(s) you are selling?
- If you click on yes, or some of them, you will be asked, ‘Do you own a government-registered trademark for the products you will sell in your store?
After answering all the questions, proceed ahead by clicking on ‘Next’.
Identity Verification
Now you need to verify your identity by providing Amazon with your ID and bank statement. Your ID identification may include your passport or driving license.
After uploading the necessary documents, click ‘submit’. Now you will asked for identity verification through a video call with an Amazon associate.
You have to do this step immediately to start selling right away. You can put it at last of your application or you can schedule the appointment for a future date or time. Once you’re verified, you are good to go!
You must enable a 2-step verification on your Amazon USA seller account for enhanced security.
Bottom-line
In conclusion, an Amazon USA seller account is created by simpler steps. You need to navigate to Amazon Seller Central and fill out your personal information that will make you eligible to move further. Sign up and create your new account, then choose your business location, type, and provide Amazon with your info i.e., Identity via passport or driving license.
Add billing information and answer all the questions asked of you about the Amazon store and the products you offer. At the end, verify your identity via phone call.
But before you initiate making this account, you have to decide your business model, your products, from where you will source them, and the listings.
Give it a thorough read to understand the procedure to make an account and what you need to know beforehand. Do you also plan to create an Amazon seller account?
FAQs on Amazon USA Seller Account
Can I sell products on Amazon in the USA?
Yes you can, you need to register as a global seller, select your targeted country, and make product listings. You also have to pay $39.99 to sell your products.
How much is Amazon US monthly fee?
The prime membership cost in the US currently is $14.99.
How do I set Amazon to USA only?
Navigate to ’Manage Your Content’, and click on Preference. Now Change under Country Setting.
You would like to read about:
- Step-by-Step Guide to How to Sell on Amazon from Alibaba
- How Much Does eBay Take and How Should I Reduce the Fees
- Shopify Pricing and Fee Structure – Which one is Best for you?
For more info visit Whatsmind.com


