
How To Screenshot On Mac: Keyboard Shortcuts, Tools, Adding Annotations, Organizing & Deleting Screenshots
With convenience comes the complexities as well, right? MacBook seems to be equipped with exceptional features but sometimes becomes hard to get through. How to screenshot on Mac has been a sought-after question these data because of its usefulness.
You can capture the full screen, part of the screen, access the touch bar, or capture the Mac window which allows you to report errors, share conversations, or record videos or photos for tutorials.
Taking screenshots might seem overwhelming but getting a knack of particular hacks makes it breezy.
In this guide, we will dive deeper into how to screenshot on Mac using keyboard shortcuts, and particular tools, and how you can add annotations, organize them, and delete them if you want.
Table of Contents
How To Screenshot On Mac Using Keyboard Shortcuts?
Mac computers don’t come with a screenshot button. Is it an inconvenience? Not at all there are many keyboard shortcuts by which you can capture anything visible on the screen.
You can take a full-screen screenshot or part of a screen’s screenshot and you can also capture a Mac window by pressing or holding fewer keys.
Keyboard Shortcut 1: Shift + Command + 3
How do screenshots on a Mac cover the whole screen? Quite simply, just press shift+ command+ 3, and the entire screen is captured on a desktop file.
The file will be saved as a screenshot with the date and time if shot.
When you take a screenshot, it will initially appear as a thumbnail preview in the right corner at the bottom of the screen where you can edit the screen before default saving.

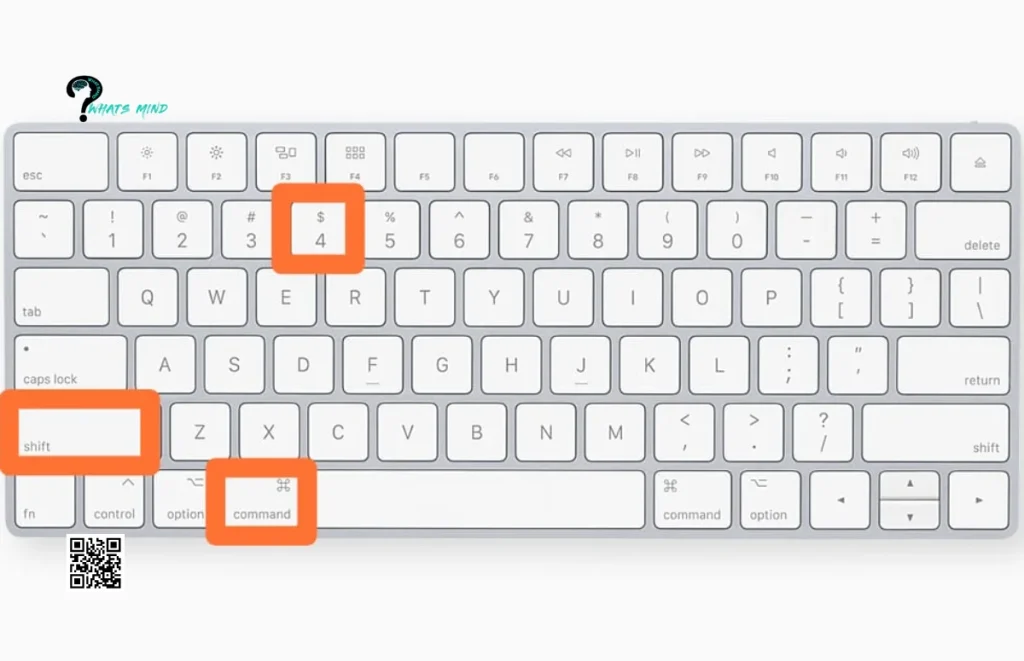
Keyboard Shortcut 2: Shift + Command + 4
How to take screenshots on a Mac that covers only a partial screen? You just have to press keys, shift+ Command + 4 and the cursor will appear on the screen as a crosshair. You can drag the cursor as far as you like to capture the screen.
The chosen area will appear highlighted, if it seems desired just let go and the Screenshot will be taken and saved to files.

Keyboard Shortcut 3: Shift + Command + 4 + Space
How to screenshot Mac Windows? It’s another simple hack: just press on keys, Shift + Command + 4, and then lastly press Space. The cursor will convert into a camera icon. To take a screenshot, highlight the Mac window using a cursor.
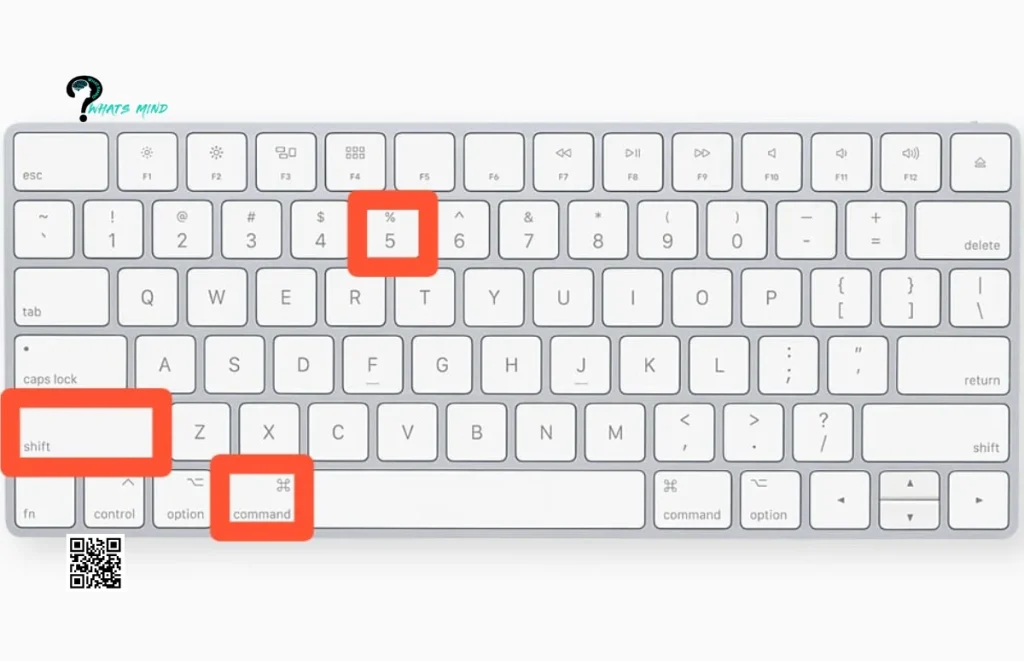
Keyboard Shortcut 4: Shift + Command + 5
Okay if you are already done with taking screenshots, now comes the part where you have to access it. You need to press this shortcut, Shift + Command + 5 to locate where your screenshots are saved.
A menu will pop up with three icons on the left side at the bottom of the screen. These icons let you take either the entire screen’s screenshot video or just part of the screen.
On the right side, two icons allow you to either capture the whole screen video or just a particular part.
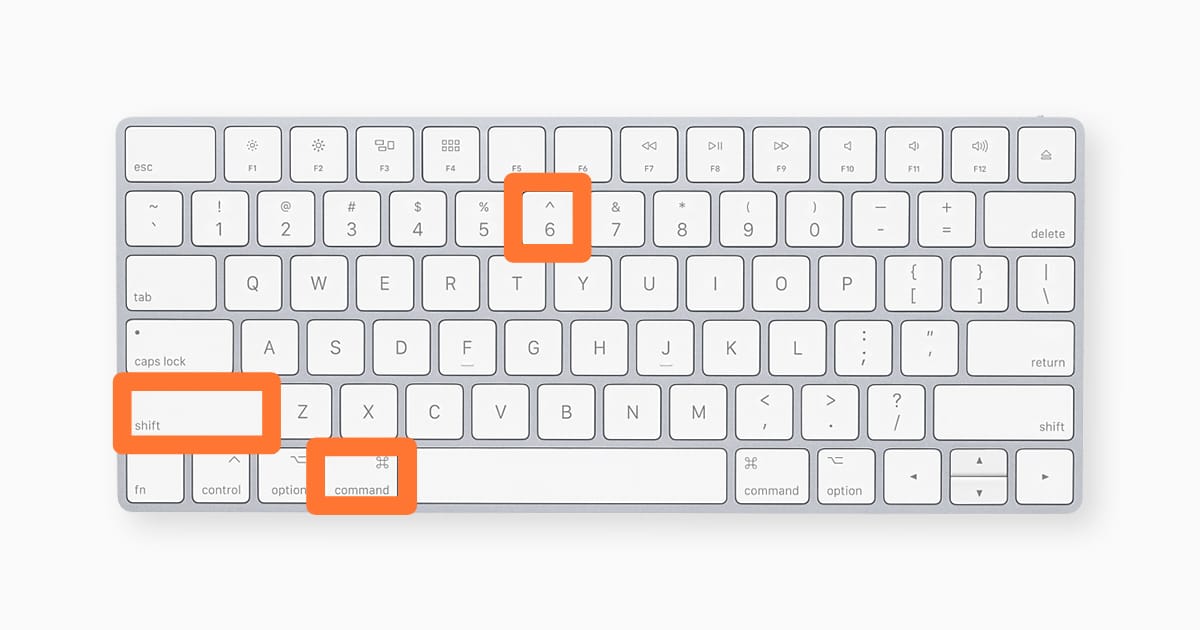
Keyboard Shortcut 5: Shift + Command + 6
What if you want a screenshot of the Touch Bar? You can press this shortcut, Shift + Command + 6. It will slow you to capture the touch bar if your MacBook possesses that.
How To Screenshot On Mac Using Different Tools?
Taking screenshots isn’t enough, sometimes you have to add annotations or share them immediately, so that’s where the use of tools that help in taking screenshots on Mac.
How To Screenshot On Mac Using CleanShot X?
This tool comes in handy to take your screenshot game to another level with its particular features including, self-timer,10Gb storage, scrolling capture facility, uncluttered desktop, and text recognition.
The app is available at $9.99 per month with 240+ apps to do different tasks.
How To Screenshot On Mac Using Xnapper?
It’s one of the most useful apps to take pretty screenshots without any additional designing tool and its features are noteworthy. The screenshot background can be customised, sensitive content can be redacted and there’s a feature of text recognition.
The tool is worth $9.99 per month with access to 240+ apps.
How To Screenshot On Mac Using Capto?
It’s hailed as the top screen recorder due to its face camera recording, voiceovers, and clean desktop. It’s also available at $9.99 each month with 240+ app access.
How To Screenshot On Mac Using Dropshare?
Want to take screenshots without any extra hassle? Here you go, Dropshare allows you to capture and share screenshots easily along with screen recordings.
You can also add annotations and voiceovers, which allows you 10GB of cloud storage along with sharing options, and even URLs can be shortened conveniently.
It’s available at$9.99/month with 240+ apps to do multiple tasks.
Adding Annotations To Screenshots Captured In Mac
Although the Mark-up features are already there, how can you still do it? You can add any text, highlight, or if required add arrows to point out details, you can make freehand sketches, add signatures, and many other things.
The steps to add annotations in your screenshot are:
- Click on the thumbnail that appears right after taking a screenshot and navigate to the Markup toolbar.
- A window will appear featuring Markup toolbar; mind it, it is a utility window without minimise, maximise, and sizing options. However, you can draw tools, add text, take a picture of ink or signature with a webcam, or use an iPhone.
- By using the shapes tool, you can add circles, rectangles, or correct wobbly lines drawn including boxes, ovals, stars, triangles, and arrows.
- You can also edit your drawings, like deselecting the tool, the cursor will become an arrow, add any annotation, adjust position colour and size, and delete if required.
- Once you are satisfied with your annotation, click on Done, you can even share this via Airdrop or simply move it to Trash.
How To Organise Screenshots on Mac?
If you have a tiny miny OCD like me and you prefer keeping your captures organised? Here are my suggestions for you, to organise them you first need to name them properly.
However, these will be automatically saved as ‘Screenshots’ with the date and time. Name these files that you can easily retrieve later on.
The desktop files are saved in the library, filed in a proper folder, and renamed files. You can also file them by color which makes you easily remember which file corresponds to which and how to locate them.
Good thing! Mac possesses all of these organising tools but again having third-party apps will even save you from this work.
How To Delete Screenshots On Mac?
Having a lot of Trash on your Mac I won’t prefer as it takes so much unnecessary space. How to get rid of them? Just press Command + Delete and tada the screenshot moves to Trash.
You can also right-click on the screenshot and move it to Trash.
But what if you don’t want it in the Trash box, as it also covers space? Just press Option + Command + Delete as it will delete them without moving them to the Trash folder and it’s pretty useful if you have a lot of captures.
Bottom-line
In conclusion, while using a Mac as a beginner, you must be wondering how to take screenshots on a Mac, organise them, and delete them if not needed.
Capturing the entire screen, part of the screen, a Mac window has become possible by pressing keyboard shortcuts. You can also use tools to capture which even beautify the screenshots by adding voice overs, removing backgrounds, or adding annotations.
You can organise these screenshots by naming them properly and deleting them by pressing shortcuts.
Give it a thorough read to fully understand the intricacies of capturing screenshots and share your opinion on it.
FAQs on How To Screenshot On Mac
How can I take a screenshot on my Mac?
You can do it by pressing Shift+ Command + 3 to capture the full screen, and shift+ Command + 4 to capture the selected part, to access the touch bar and Mac window press shift+ Command + 6 and shift+ Command + 5, respectively.
How do you snip and paste on Mac?
Press shift+ command + 3 by which the toolbar will appear, move to options, and save a snippet will automatically be copied to the clipboard which you can paste anywhere you like.
- Hard Reset iPhone 11: Detailed Guide, Reiboot Application, Issues, Difference of Factory & Hard Reset
- 6 Secret Performance Tricks to Unlock iPhone Speed Like a Pro
- How to factory reset iPhone without password?
For more information, visit Whatsmind.com